How to automate an iOS biometric scanner app How to automate an iOS biometric scanner app
Skip to main content

Select your location

iPhone floating in a minimalistic background

How to automate an iOS biometric scanner app

We strive for extremely high UI test coverage on all of our projects here at Kin + Carta, but the team has been facing an issue when trying to automate biometric features in our apps.

Although the Simulator has menu options to enrol and simulate biometrics, sadly these options are unavailable as part of XCUI. There are options such as simulating pressing the home button, but no such option for biometrics.

Scroll down if you just want to skip to the solution to automate a biometric scanner app, but first, let me talk you through how we got there.

Automate ios biometrics app

A starting point

The first thing we looked into was whether choosing “Enrolled” from the menu updated a user default setting for the Simulator app on macOS, so we fired up Terminal and typed in defaults read com.apple.iphonesimulator.

We trudged through all of the options but found nothing that would help us.

Sad times. But we didn’t give up!

Automate the automation

After failing to find anything useful in user defaults, we turned our attention back to the Simulator app. Since the menu needs to be clicked, we started to think about how we could control the Mac during automation tests.

AppleScript is made for exactly this kind of thing, so we started playing around with scripting the macOS UI. Initial investigations looked really promising, so we pursued it.

The really hard part was controlling the Mac with AppleScript from within UI tests since you can’t run AppleScript directly from within the iOS simulator.

Our engineers envisioned the concept of a biometric server; a lightweight server instance. Spun up locally when the tests run, it would accept HTTP requests and can be called like any other network call, but sits outside of the simulator runtime, so it can execute AppleScript.

Once we found out Xcode schemes can run a “pre” and “post” scripts to spin up the server and tear it down at the end, we got really excited.

Automate the automation

Soon we had a proof of concept running and had a real UI test running that enabled and disabled biometrics in the app. Hooray!

So this is it, right? This is the solution?

Sadly, readers, it is not. We found that our AppleScript code wasn’t super reliable, and required really specific setups. The simulator has to be open (we usually ran in headless mode), and the simulator window has to be active otherwise the AppleScript would fail.

We kept tweaking our scripts, but we kept getting strange, seemingly random errors, so we shelved the idea until we could come up with something more robust.

The juicy fruit

If we didn’t use AppleScript to automate biometrics, what did we use?

We have to thank our Android brothers and sisters for giving us a new path to follow. The Android team has also faced similar problems and came up with a similar solution using a local server instance to control the emulator.

The difference though is that the Android biometric server controls the emulator using ADB (Android Debug Bridge), which can do lots of wonderful things, including simulating a successful biometric authentication.

This got us thinking about the iOS equivalent: simctl (part of xcrun). It didn’t take long for us to realise that simctl is nowhere near as powerful as ADB, but by chance, we did a quick Google search:

simctl-biometrics

And lo, the first result was for a GitHub repo called AppleSimulatorUtils. A command line utility that controls many of the Simulator menu items, including biometrics. Better still, it uses simctl and not AppleScript.

The way it works is by spawning a notifyutil process within the simulator runtime, which is then used to send a distributed notification across the iOS system that the Simulator listens for and toggles biometrics on (or off):

xcrun simctl spawn 'iPhone X' notifyutil -s com.apple.BiometricKit.enrollmentChanged '1' && xcrun simctl spawn 'iPhone X' notifyutil -p com.apple.BiometricKit.enrollmentChanged

There are actually two commands here, one to 'set' the new value, and one to actually post it:

  • xcrun simctl: runs a command using simctl.
  • spawn 'iPhone X' notifyutil: tells the iPhone X Simulator to spawn a notifyutil process.
  • -s com.apple.BiometricKit.enrollmentChanged '1': sets the value of 1 to the com.apple.BiometricKit.enrollmentChanged notification.
  • -p com.apple.BiometricKit.enrollmentChanged: posts the notification using another spawn of notifyutil.

Note that this doesn’t enable the little checkmark in the Simulator menu, but it does recognise it as enabled when you run your app!

It gets better!

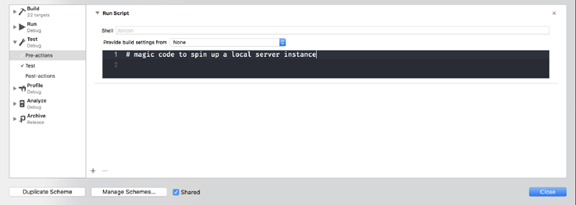
This is a pretty good solution that we can modify our biometric server to use instead of AppleScript, but we didn’t stop there!

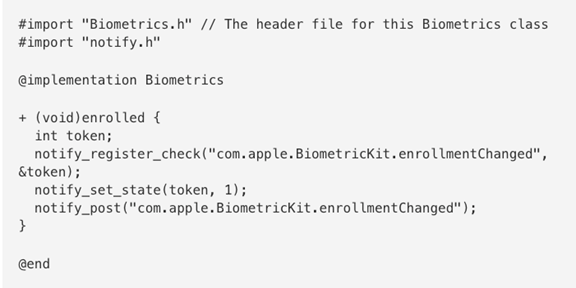
Looking at notifyutil, we realised that it’s just sending a cross-process Darwin notification. Darwin notifications are similar to (NS)Notification but not restricted to only being sent and received within a sandboxed app; they’re broadcast across the whole system and any app can observe them, even on iOS.

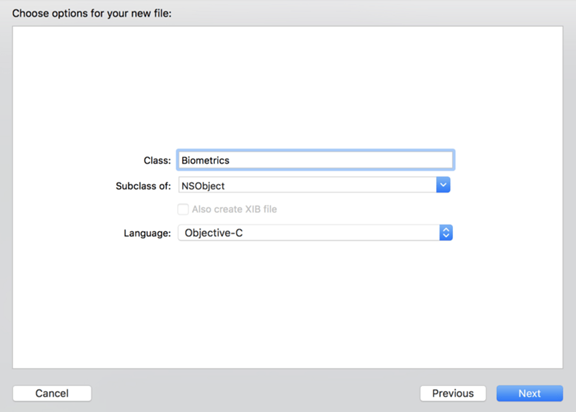
The usual way of sending a Darwin notification doesn’t allow you to set a value, so we had to go even lower level and use a different set of APIs. Unfortunately, these APIs are only available in Objective-C, so we’re going to have to go back in time a bit and write some good old fashioned C:


Import biometrics code

Check out those semi-colons! Blast from the past. Anyway, this code is very similar to the call to notifyutil:

  • First, we get a token for the notification named com.apple.BiometricKit.enrollmentChanged using notify_register_check.
  • Then we set the state of that token to 1 (you can also pass true here because C isn’t as strict as Swift). The system persists this state for us so anyone registered as an observer can query it (or change it).
  • Finally, we post the notification, which prompts the simulator to check the value and enrols the device for biometrics.

If you want to try this out, you’ll need a couple of extra files, as is the Objective-C way. You’ll need a header file for the Biometrics class, and a bridging header so you can use it in any Swift code.

The easiest way to get this working is to use an Xcode template for a new “Cocoa Touch Class”. Choosing Objective-C as the language should automatically prompt for you to allow Xcode to create a bridging header for you:

Automate ios biometrics

Because this is inter-process, we don’t need to run this in a server instance outside of the simulator runtime. We can freely call this from our UI tests to enable (or disable) biometrics as the tests need it:

Functional test biometrics

And there we have it! An easy, dependency-free way to enable biometrics during UI tests, without using an external server. It’s not much extra work to modify this to unenrol biometrics, and even successfully match a fingerprint or face.

Smashed it

I’ve created an example project you can find on GitHub for those of you who would rather see it in action. As a little treat, the example project also includes simulating a successful biometric authentication. Feel free to check it out and let me know what you think!

I’m really proud to work somewhere where everyone has an insatiable desire to not give up and push the boundaries of what’s possible.

Interested in learning more about automation in iOS?

Get in touch