
Select your location

Test Drive: Google Discovery AI

Jake Holmquist
Bar chart with shopping carts

Google-quality Search and Recommendations for all of your digital properties

In this article, we’ll explore Google’s Discovery AI suite of products — Search/Browse and Recommendations AI— by creating a demo environment and test-driving each of the core components using sample data.

What is Google Discovery AI?

While ChatGPT, Bard and Generative AI are currently in the headlines, Google has been quietly infusing AI into its products for years to make them more intelligent, predictive and more accessible to the masses. Google’s Discovery AI suite is no different.

Discovery AI employs advanced understanding of user intent and context, Natural Language Processing (NLP), and Google’s expertise in AI that enables advanced query understanding and personalization — delivered through familiar API integration patterns with client libraries for all of the major programming languages. Everyone now has the ability to provide Google-quality search, browse and recommendations on their own digital properties with Discovery AI.

Implement Discovery AI to Increase conversions and reduce search abandonment

Chat with our experts

Creating a Discovery AI instance in under 10 minutes!

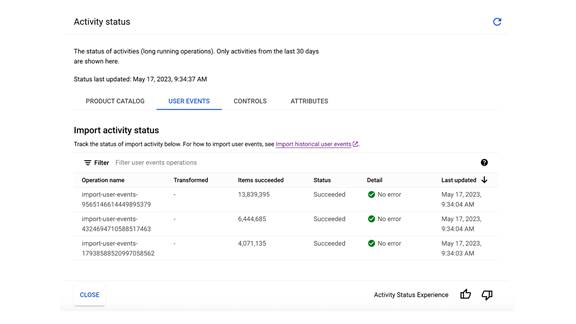
Using an open dataset of movie ratings from MovieLens, we’ll construct a product catalog of movie titles and user-event data consisting of over 25 million movie ratings to simulate customer behavior on an ecommerce site.

1. Clone the quickstart Github repo

I’ve created a Github repo that will do most of the heavy lifting so you can focus on the fun stuff in the Google Cloud Console;). To start, you’ll need a terminal with git and the Google Cloud SDK installed. The Google Cloud Shell is a great place to run these commands since both git and the Cloud SDK are already installed!

The full explanation can be found here:

https://github.com/cloud-jake/recai-moviedb

Otherwise, let’s get started by cloning the repo.


git clone https://github.com/cloud-jake/recai-moviedb.git


This will create a new folder with the quickstart code inside. CD into the folder.


cd recai-moviedb


2. Setup variables

Now that you are in the recai-moviedb folder, list the files by running the ls command.


$ ls -n
-rwxr-xr-x 1 1000 1000  632 May 17 01:33 00-project-setup.sht
-rwxr-xr-x 1 1000 1000 1024 May 17 01:33 01-prepare-dataset.sh
-rwxr-xr-x 1 1000 1000 3396 May 17 01:33 02-create-views.sh
-rwxr-xr-x 1 1000 1000 1348 May 17 01:33 98-import-retail-data.sh
-rwxr-xr-x 1 1000 1000  878 May 17 01:33 99-create-bq-tables.sh
-rw-r--r-- 1 1000 1000  982 May 17 01:33 README.md
drwxr-xr-x 2 1000 1000 4096 May 17 01:33 schema
-rw-r--r-- 1 1000 1000  184 May 17 01:33 variables.inc


Notice a file called variables.inc. We’ll edit the file to update the following variables that will be needed by the quickstart scripts:


# Name of project to create
PROJECT=
# Billing account ID to attach to project
BILLING_ACCOUNT=
# Location and Region
LOCATION=US
REGION=us-central1

PROJECT — the name that you will give to your project. Make sure that this is globally unique and adheres to the Google Cloud project naming conventions.

BILLING_ACCOUNT — an existing billing account ID in the format of 012345–678910-ABCDEF

Optionally, update the LOCATION and REGION to match your locale. These parameters are used for Bigquery and Cloud Storage bucket locations.


3. Run the quickstart scripts

Now that you’ve set the variables, you are ready to run the quickstart scripts. Run the scripts in order, one by one, and take note of any error messages or output. Only the following scripts are required:


00-project-setup.sh
01-prepare-dataset.sh
02-create-views.sh


The remaining scripts provide sample code for scheduling the data import jobs (98-import-retail-data.sh) and creating the template Bigquery tables using the Retail User Event schema (99-create-bq-tables.sh).v

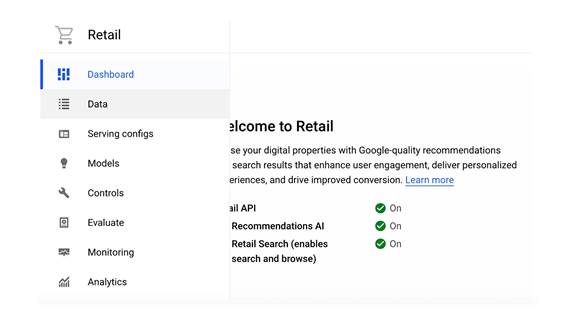
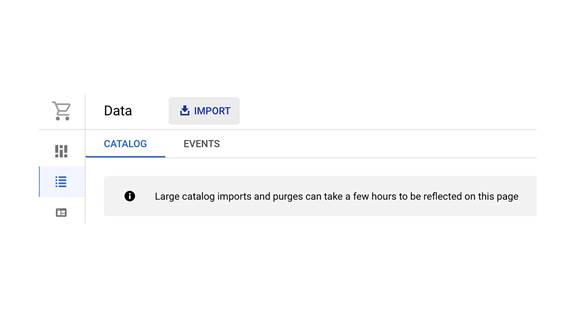
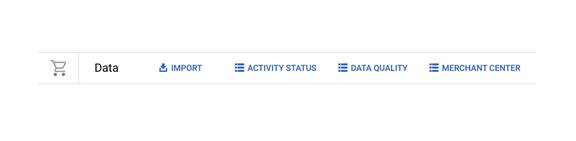
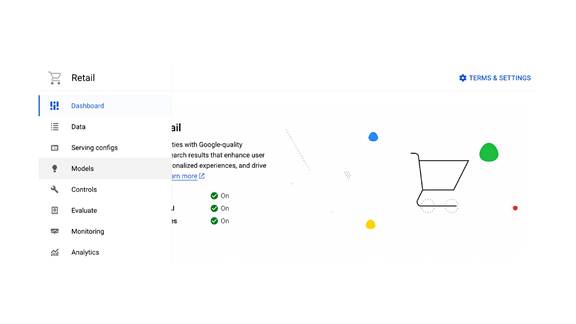
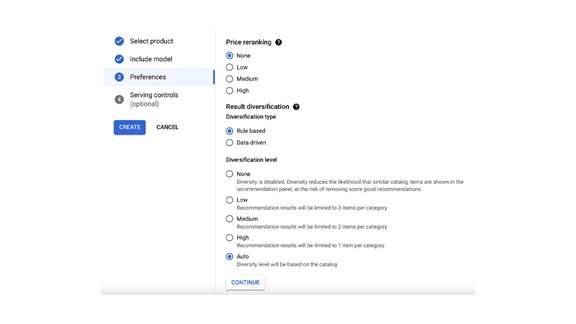
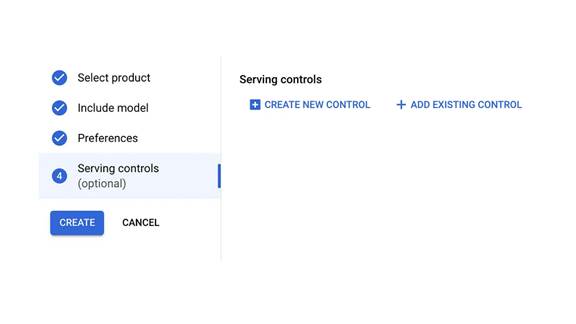
Congrats! You have just created a basic Discovery AI foundation. Now it’s time to head over to the Cloud Console to load data and test drive Search and Recommendations AI!

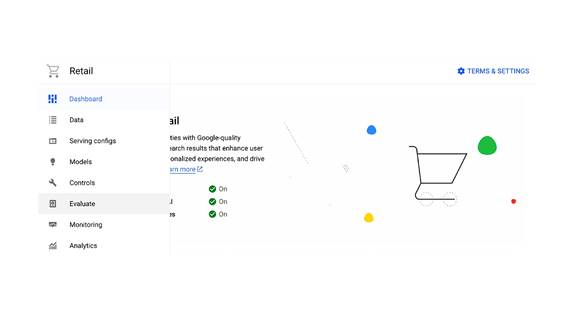
4. Access the Discovery AI Cloud Console

To access the Discovery AI Cloud Console, open your web browser to:

https://console.cloud.google.com/ai/retail

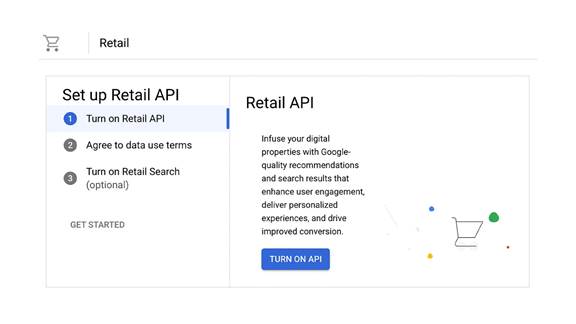
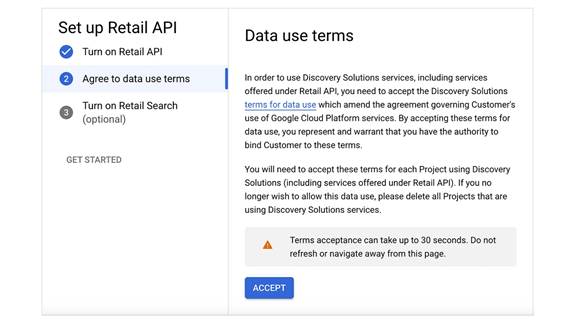
The first time you access the console, you’ll need to activate the Retail API and click through the Data Use Terms.

Turn on the Retail API

Discovery AI Cloud Console - Turn on Retail API

Accept the data use terms.
Set up Retail API - Agree to data use terms

Turn on Retail Search.
Set up Retail API - Turn on Retail Search

You should receive a confirmation that the Retail API has been enabled and the Recommendations AI and Retail Search components are both on.

Welcome to Retail confirmation page

5. Load Product Catalog and User Event data

The quickstart scripts that we already ran populated a number of Bigquery tables with the same movie data as well as created 5views following the Retail Schema format in the movielens dataset:

  • products — full list of movies in the format of a product catalog
  • user_events_homepageview — user ratings ≥ 0 to simulate a customer accessing the site homepage and firing the home-page-view tag
  • user_events_detailpageview — user ratings ≥ 4.0 to simulate a customer accessing a product detail page and firing the detail-page-view tag
  • user_events_addtocart — user ratings ≥ 4.5 to simulate a customer adding an item to their cart and firing the add-to-cart tag
  • user_events_purchasecomplete — user ratings ≥ 5.0 to simulate a customer completing a purchase and firing the purchase-complete tag

(Reference: User Event Types for Discovery AI

We’ll need to complete the data load process 5 times — once for each of the Bigquery views listed above.

To load the Product Catalog, start by clicking Data from the Retail menu.

Retail menu - Select Data

Click Import at the top of the screen to open the import dialogue.

Select 'Import'

In the Import Data dialogue, select the following:

  • Import type = Product Catalog
  • Source of data = BigQuery
  • Import branch = Branch 0
  • Schema of data = Retail Product Catalogs Schema
  • Big Query table = select the products table from the movielens dataset
Selections in the 'Import data' dialogue

Click Import to kickoff the import process. You should get a black pop-up box with a confirmation and a code snippet at the bottom of the screen that you can use to automate future imports (we can ignore that for now). You can safely close the Import Data dialogue box by clicking out of the box or clicking cancel.

To check on the status of the product catalog import, click the Activity Status menu at the top right of the screen.

To check on the status of the product catalog import, click the Activity Status menu at the top right of the screen.

We should see the “import-products” job in process.

We should see the “import-products” job in process

We also need to load the 4 different event types from the user_event_* views that we created earlier. We’ll repeat the same process that we used to import catalog data, but instead of selecting Import type = Product Catalog, we’ll now select Import type = User Events. For each of the 4user_event tags, we’ll perform a separate import, selecting the appropriate Bigquery view for each.

Click Import at the top of the screen to open the import dialogue.

In the Import Data dialogue, select the following:

  • Import type = User Events
  • Source of data = BigQuery
  • Schema of data = Retail User Events Schema
  • Big Query table = select one of the following tables (views) from the movielens dataset for each user_event type (repeat the process for each view):

— user_events_homepageview
— user_events_detailpageview
— user_events_addtocart
— user_events_purchasecomplete


 Load the 4 different event types from the user_event_* views that we created earlier

After you’ve completed the import for each of the 4 user_event types, check your import status by again clicking the Activity Status link at the top of the page. Note that you’ll need to click the User Events tab. Since we are importing millions of user events, it may take a few minutes for the imports to complete.

Check your import status by again clicking the Activity Status link at the top of the page, on the User Events tab

Leverage Google-quality search in your business today

Contact us

6. Explore data quality

Once you’ve completed importing data, it’s a good idea to review any warnings about data quality. Since this is sample data using only the minimal required fields, we should expect to see some warnings — especially related to the data catalog. For this demo, we can safely ignore warnings about missing descriptions and searchable attributes (we omitted those fields in our sample data import). It may take some time after your initial import for the data quality results to populate.

One of the most important warnings that you’ll want to reconcile before moving forward is any unjoined events in the Events data. Since we constructed the data imports from a single dataset, we already ensured that each user_event mapped back to a product (movie) in the product catalog. In real-world scenarios, you’ll want to design your data imports to ensure consistency between the product catalog and user_events — and have monitoring in place to address inconsistencies as they arise.

Check Data Quality - Catalog tab
Check Data Quality - Events tab

Once you’ve loaded catalog and user_event data and verified data quality, you are ready to test-drive Search and Recommendations AI!

Test drive Discovery AI features

Evaluate Search capabilities of Discovery AI

Everyone is familiar with search and has come to expect site-search to perform as well as Google. That’s rarely been the case, but now Discovery AI lets you use the same technology as Google on your website and/or app. To start evaluating the search capabilities of Discovery AI, head on over to the Evaluate link in the Retail menu.

Go the Evaluate link in the Retail menu

Click on the Search tab at the top of the screen and enter a query in the search box. Note that we can also evaluate personalized results for a particular website visitor based on the Visitor ID or User ID that we capture in our user_event data. In a real-world scenario, this data would likely come from GA4 (Google Analytics) and/or GTM (Google Tag Manager).

Click on the Search tab at the top of the screen and enter a query in the search box

You’ll see in the results section below that a number of Toy Story movies are returned and ranked at the top of the list. There are also a number of related results that do not include the keyword “Toy Story” such as “Buzz Lightyear of Star Command: The Adventure Begins (2000)” and “Pixar Story, The (2007)” — which are ranked higher than a number of other less-related matches.

Thinking about the main character in Toy Story, the cowboy named “Woody”, let’s try a search with just the character’s name:v

Search "Woody" from Toy Story

Note that the results include two prominent “Woody” characters — Woody Allen and Woody Woodpecker, but the next two most relevant results are the top two Toy Story movies. Recall from the data quality section that we omitted both description and searchable attributes in our product catalog import. None of the data that we loaded includes the name of the characters or any keywords for “Woody”, but Google’s understanding of intent identifies Toy Story as relevant results for the search term of “Woody”. Pretty cool, huh?

Discovery AI takes care of misspellings and synonyms automatically as well — one of the top pain points and areas where manual efforts to maintain and get ahead of search issues can be eliminated! For example, try your worst at misspelling a movie name — “yiy stry”….. (I can’t believe that actually worked…)

Try misspelling a movie name — “yiy stry”

Beyond the default Search serving config, you can explore adding controls to the Search serving config to further customize the out-of-the-box results. While this is a powerful feature to further customize Discovery AI’s search capabilities to include domain or business specific configurations, oftentimes over 90% of manual rules and configurations can be eliminated with Discovery AI.

Recommendations AI

The initial configuration for Recommendations AI includes a simple model called recently viewed based on the past user_event history for a particular Visitor ID. TBH, it’s not really a model but rather a list of past detail-page-view events. To test out this “model”, navigate back to the Evaluate link in the Retail menu. In the Recommendations tab, enter the following Visitor ID: 210

Go to the Evaluate link in the Retail menu. In the Recommendations tab, enter the following Visitor ID: 210

We can see that this particular customer recently viewed three movies. This will be a good example when we build a recommendations model. You can find other Visitor IDs in the ratings table in Bigquery. Here is the query that I used to identify customers with a detail-page-view event for American Pie (submitted a rating of ≥ 4.0). Try some variations to get customers with a purchase-complete event (rating ≥ 5.0).

-- Get users who have rated American Pie (2706) 4.0 or greater
-- These users have the detail-page-view event for the movie
WITH AmericanPie40 AS (
SELECT userid
FROM `movielens.ratings`
WHERE movieId = 2706
and rating >= 4.0
)

SELECT A.userid, count(DISTINCT movieid) as countmov
FROM `movielens.ratings` M, AmericanPie40 A
WHERE A.userid = M.userid 
group by userId
order by countmov ASC

Build your first Recommendations AI model

*Billing Alert: Building and Training models will result in accelerated billing consumption. Refer to the Pricing page for Discovery AI for details.

Up until now, loading data and performing evaluation queries has accumulated little to no billing activity. Building, training and tuning Recommendations AI models will start to consume billing resources. Be sure that you have created billing alerts and monitor costs accrued from using Recommendations AI.

With that said, Discovery AI is still a very cost-effective solution!

Creating RecAI Models

To create our first RecAI, click the Models link in the Retail menu.

Click Create Model at the top of the screen

Next click Create Model at the top of the screen. Notice the default recently viewed model that we already queried.

To create our first RecAI, click the Models link in the Retail menu

Let’s first explore the different model types and the data requirements for each model. Pay close attention to the “Data requirements met?” section. In this case the Recommended for you model requires five different data metrics to be satisfied. In our case, all are green and meet the requirements.

Explore the different model types and the data requirements for each model -  “Data requirements met?” section

Also notice that changing the Business Objective also changes the data requirements for the model. Change the business objective from Click-through rate (CTR) to Revenue per session. Notice that there are now eight data metrics that we need to satisfy.

Changing the Business Objective also changes the data requirements for the model. Change the business objective from Click-through rate (CTR) to Revenue per session. Notice that there are now eight data metrics that we need to satisfy.

To continue creating the Recommended for you model, give the model a name and select a Tuning preference frequency and Filtering by attribute values, then click Create. Your model will take 2–5 days to complete training and be ready for querying.

* Training a model will incur costs, which may be significant if not monitored.

In order to query your model, you’ll need to create a Serving Config. From the Retail menu, select Service Configs.

To query your model, select Service Configs from the Retail menu

Click Create Serving Config to open the dialogue.

Select Recommendation.

Give your serving config a name and click Continue.

Click Create Serving Config to open the dialogue.  Select Recommendation.  Give your serving config a name and click Continue

Choose the model that we just created: rfy

Choose the model that we just created: rfy

Select your Price reranking and Result diversification rules. You can leave the defaults.

Select your Price reranking and Result diversification rules

Finally, click Create.

Click 'Create'

You’ll need to wait until your model has completed training to query and evaluate it. You can create up to 20 different variations of the models that are currently available, optimized for different business objectives.

What do you think of Google Discovery AI?

In this article you learned how to stand up a Discovery AI environment in Google Cloud, load sample data in the Retail Schema format and evaluate search and recommendations queries. If you found this useful, please check out the Google Cloud Discovery AI solutions.

*Attribution

This article is based on the tutorial Create personalized movie recommendations here.

Implement Discovery AI to Increase conversions and reduce search abandonment

Chat with our experts

Share this article

Show me all