
Select your location

Migrate with ease to Azure Spring Apps - two examples

Sudeep Moothedath
azure spring apps

Azure Spring Apps is a fully managed PaaS solution, built jointly by Microsoft and VMware.

For applications running in the Spring ecosystem, Azure Spring Apps can be a near-identical option for migrating from PCF. It provides an Azure-native implementation of PCF with minimal requirements to migrate from on-prem PCF.

This article explores the ease of this migration.

Video series: How to migrate with ease to Azure Spring Apps

Watch now

Example 1: Migrate Spring Data Redis to Azure

This section details the ease of migrating a Spring Data Redis app from on-premise to Azure with NO code or configuration changes. The exact same code that’s running in on-prem can run in Azure as well.

The code for a simple application that saves and retrieves data using Redis is present in Github. The same code will be used to deploy to Azure WITHOUT making any changes.

Azure Setup

Azure Spring Apps

Assuming that a valid subscription and a resource group already exists and the user is already logged in to the Azure CLI, set the defaults for resource group and location. This will prevent the need to enter them for each command. 

az config set defaults.group= <resource_group_name>defaults.location=<location>

Create an instance of Azure Spring Apps (ASA) using the below command. If the spring extension is not installed, the CLI provides the option to install and create the instance.

az spring create -n <spring_cloud_name>


Azure Cache for Redis

Create the Redis cache before deploying the applications. It will prevent the need to make multiple deployments.

az redis create -n <name_of_redis_instance> --sku

 <Basic/Premium/Standard> --vm-size <size> --enable-non-ssl-port


For this example, use sku=Basic and vm-size=c0. This configuration should only be used for development/testing.

The CLI may not wait for the Redis cache to be fully provisioned, so check for the provisioning status using the command below:

az redis show -n <name_of_redis_instance>


Look for the variable provisioningState. Wait until it shows Succeeded.

Now, create the application.

az spring app create -n <app_name> -s <name_of_azure_spring_apps>  --runtime-version Java_11


Azure Spring Apps provides a feature called Service Binding. It allows the application to connect to a predefined list of Azure Services. Once the Service Binding is created, all the properties needed by the Azure Spring Apps application will be injected as Environment Variables.


Once the app is created, access it through Azure Portal (Home->All Resources->name_of_azure_spring_apps->Apps->application_name).

Click on the Service bindings option from the Left menu.

Click on Create service binding.

Provide any name for the binding and select Azure Cache for Redis from the Binding type dropdown. It will populate the list of all available services of this type.

Select the instance created during the Azure Setup. The list of keys will automatically populate.

Select the Primary Key and select Use SSL as false and click Create.

Note: This particular example was tested only for the non-secure port.

Once the Service Binding is created, open it and notice the presence of the below variables: 

spring.redis.host=
spring.redis.port=
spring.redis.password=


As noted at the start of this article, the Configuration class can read environment properties with the prefix spring.redis. That is all the application needs to connect to the Redis instance.


Deployment

Deploy the code using the command below:

az spring app deploy -n <app_name> -s <name_of_azure_spring>
--artifact-path <path_of_generated_jar>
 

The app log can be tailed in a different window using the command below:

az spring app logs -n <app_name> -s <name_of_azure_spring_apps> -f


The application will start without any errors.


Testing

Access the Test URL for the application through the Portal. It will be available under the Overview section of the application. Invoke the save endpoint through CURL or any other tool.

curl -X POST"<application_url>/save?firstName=John&lastName=Doe"


Validate the presence of this data by accessing the GET method.

curl "<application_url>/persons"


This will display the saved data.


No Code Changes Required for Spring Data Redis Migration

In summary, there are absolutely NO changes needed to migrate an on-premise Spring Data Redis application to Azure using Azure Cache for Redis. The code does not even require any Azure dependency. This is made possible by the usage of Service bindings within Azure Spring Apps.

Example 2: Migrate Spring Cloud Stream apps with RabbitMQ to Azure Spring Apps with Azure Service Bus

Azure Service Bus is a fully managed enterprise message broker with message queues and publish-subscribe topics. Spring Boot PCF applications utilizing the in-built RabbitMQ Tile or on-prem RabbitMQ can migrate to Azure Spring Apps with a minimal set of configuration changes and requires NO code changes.

The source code for a set of Spring Boot apps utilizing the in-built RabbitMQ tile or on-prem RabbitMQ is available here. This codebase will be used for the migration. The data flow is depicted in the below diagram.
azure spring apps


Azure Setup

The Azure Spring Apps setup can be reused from the above section.

Azure Service Bus

az servicebus namespace create -n <name> --sku Standard


Since the applications use Topics, a Standard plan is needed. The Basic plan supports only Queues.

Once the Service Bus namespace is created, add the Topic. The name used in the ValueController is values-topic

az servicebus topic create -n values-topic --namespace-name
<namespace_name>

Now, retrieve the value of primaryConnectionString from the json returned by the below command. This will be used by the application to connect to the Service Bus namespace in this example.

az servicebus namespace authorization-rule keys list 
--namespace-name <namespace_name> --name
RootManageSharedAccessKey


Save this connection string for later. This is just for the demo. In a Production app, integrate with Azure Key Vault to securely access the connection string.

Since the Processor and Consumer uses the uppercase-values-topic, create it by following the above steps.

Once the topics are created, appropriate subscriptions have to be created as well. In this example, Processor subscribes to values-topic and Consumer subscribes to uppercase-values-topic. So, these two services have to be registered as the subscribers in the corresponding topics. Create them as below:

az servicebus topic subscription create --namespace-name
<namespace_name> --topic-name values-topic --name processor


az servicebus topic subscription create --namespace-name
<namespace_name> --topic-name uppercase-values-topic --name consumer


Note: Before deploying the Processor and Consumer apps, both the topics and the subscriptions should have been created. Otherwise, the apps won’t start.

Source Code Changes

Clone the Spring Cloud Stream with RabbitMQ code from the Git. The Spring Cloud Stream abstracts away any code needed to connect to a particular messaging platform. As a result, most of the changes will be in the build.gradle file.

Producer
Dependencies

Since Producer is a Web project that will publish an event to Azure Service Bus, select the below list of dependencies in https://start.spring.io/

Spring Web, Cloud Stream, Azure Support, Lombok

If the Azure Support is greyed out, try a different, stable version of Spring Boot.The generated build.gradle should resemble the file here.

Apart from these dependencies from the Spring Initializer, Service Bus specific dependency needs to be added manually. Since this app uses a topic (not queue) in the RabbitMQ example, the topic specific dependency needs to be added as below:

implementation 'com.azure.spring:azure-spring-cloud-stream-binder-servicebus-topic:2.5.0'


Configuration

In order to connect to Azure Service Bus, a connection string needs to be provided. So, create an application.yml file and add the below lines. Use the connection string value obtained earlier during the Setup

spring:
 cloud:
   azure:
     servicebus:
       connection-string: 


Note: Providing connection string directly in the yml file is only recommended for local/test purposes.

For Production Ready applications, integrate with Azure Key Vault to securely retrieve the value.

Processor & Consumer
Dependencies

The build.gradle from the Producer can be reused by removing the web dependency alone since Processor and Consumer doesn’t have web interfaces. Ensure that the servicebus-topic dependency exists.

Configuration

Since the Processor and Consumer applications already have an application.yml with Topic details, we just need to add the connection string property. Copy that section alone from the Producer application.

With this, the code changes are completed. The final code is available in the GitHub.

Deployment

Now the code is ready to be deployed. Generate the boot jars using clean and assemble. Deploy the apps to Azure Spring Apps using the command below:

az spring app deploy -n <app_name> -s 

 <name_of_azure_spring_apps> --artifact-path
<path_of_generated_jar>

 The app log can be tailed in a different set of windows using:

az spring app logs -n <app_name> -s <name_of_azure_spring_apps> -f


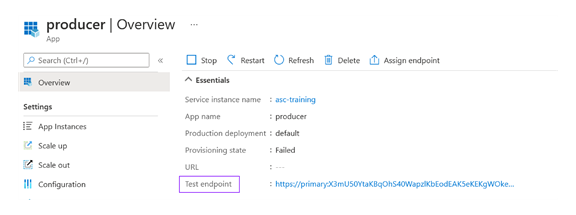
Once the apps are deployed and started, the changes can be tested using the Test URL of Producer app in the Azure Spring Apps apps page.

azure spring apps
Test URL for Producer App

Testing

Invoke <producer_test_url>\values\abc. The following logs will be seen in each service:

Sending batch with size[1] in Producer logs. Received abc and Sending ABC in Processor logs and Received ABC in Consumer logs.

This can also be validated by accessing the Azure Service Bus blade in the Azure Portal. The number of messages will be the same as the number of times the test url was hit.

It's Simple to Migrate On-Prem, Event-Driven Apps to Azure Spring Apps

The above steps show the ease of migrating on-prem, event-driven apps to Azure Spring Apps. With changes in the dependencies and configuration files, the code can be easily ported. To learn more about how to migrate with ease, check out our video series below. 
In this video series, experts from Kin + Carta and Microsoft will explain and show the ease of migrating Spring Boot applications from on-prem to Azure Spring Apps with little to no code changes. The series will also cover the automation of provisioning and deployment along with setting up Monitoring, alerting and logging using out of the box solutions from Azure. Learn more about migrating your apps to Azure Spring Apps with ease today.
Microsoft Solutions Partner badge
Kin + Carta is proud to be a Microsoft Solutions Partner

Share this article

Show me all